Embedded Wizard Studio: Gallery Templates window
In this window you access and manage templates. As a template is considered a project fragment, which you can simply use in your project wherever it is appropriate. Depending on its purpose, the template can contain one or even various related project members. It can, for example, represent a simple variable or even the entire implementation of a complex GUI component.
For the sake of clarity all templates are organized in folders and indicated by small icons and unique names. In addition the available short description is displayed below the particular template name. The Templates window is arranged per default in the left area of Embedded Wizard Studio:

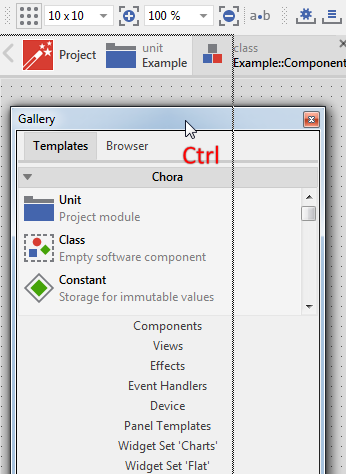
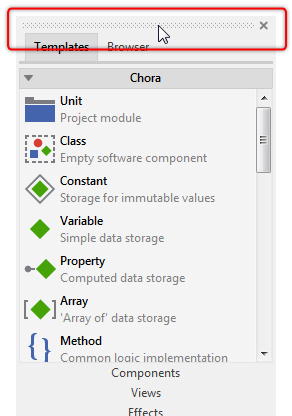
Gallery Templates window with currently opened folder Chora and the associated templates
Embedded Wizard Studio includes per default an extensive set of templates for various typical application cases. If you want, however, you are free to add new folders and manage there your own private templates. You can, for example, prefabricate a GUI component and store it as a template. Later, when working on another project, you can easily reuse this component implementation.
Please note, as long as no project is opened in Embedded Wizard Studio, the Templates window remains empty displaying only the short message: 'No templates loaded'.
Folders overview
The following table gives a short description about all folders available per default in every Embedded Wizard Studio installation:
Folder |
Content |
|---|---|
Chora |
Individual templates for all kinds of project members of the programming language Chora. Since Chora is the underlying core technology of Embedded Wizard, you will very often use these templates. |
Components |
Templates for often used GUI components or widgets. The look and the function of the components are intentionally kept very simple. You can modify and extend the components easily according to your very particular GUI design requirements. |
Resources |
Templates for bitmap and font resources as well as other assets needed by typical GUI applications. |
Views |
Prepared set of templates for view objects implemented originally in the framework Mosaic. You use these templates when you compose the appearance of a GUI component. |
Effects |
Prepared set of templates for timer and effect objects implemented originally in the framework Mosaic. You use these templates when you add animations to a GUI component. |
Event Handlers |
Prepared set of templates for touch screen, mouse and keyboard event handler objects implemented originally in the framework Mosaic. You use these templates when you add keyboard and touch screen functionality to a GUI component. |
Device |
Set of various templates covering typical application cases when implementing the interface between the GUI application and the device. |
Widget Set 'Charts' |
Prepared set of templates for various objects implemented originally in the Charts add-on of the framework Mosaic. You use these templates when you add diagrams to a GUI component. |
Widget Set 'Flat' |
Prepared set of templates for diverse widget objects implemented originally in the Flat add-on of the framework Mosaic. The widgets are designed in the 'flat' look and are intended to be used as they are. |
Widget Set 'Steel' |
Prepared set of templates for diverse widget objects implemented originally in the Steel add-on of the framework Mosaic. The widgets are designed in the 'steel' look and are intended to be used as they are. |
Widget Set 'XFlat' |
Prepared set of templates for diverse widget objects implemented originally in the XFlat add-on of the framework Mosaic. The widgets are designed in the 'extra flat' look and are intended to be used as they are. |
Show the Templates window
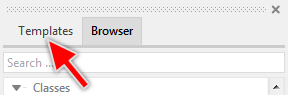
The Templates window shares a common screen area with the Gallery Browser window. Which of the both is currently visible is determined by the tabs at the upper edge of the window. Using these tab you can switch between the both windows:
★To show the Templates window click on the tab :
★Alternatively you can press the key Alt1
★... or select the menu item to show and activate the Templates window.
Using the described menu item or the shortcut while the Templates window is already visible causes the window to become focused only. Subsequently you can interact with the Templates window by using the keyboard without the necessity to previously click on it with the mouse.
TIP
As long as the Templates or the Browser window is active you can simply toggle between both by pressing the key CtrlTab.
Show description of a template
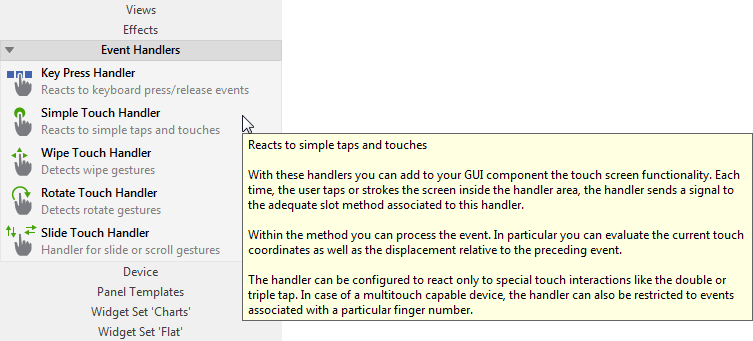
Every template can contain an additional (optional) description text. If available, the first paragraph of the description is displayed directly in the Templates window just below the corresponding template name. The complete description, in turn, is shown in a small tooltip window when you rest the mouse pointer over the template for a short period:
Navigate between folders
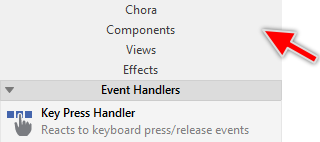
The Templates window maintains always one folder opened while all other folders are closed. Opening a folder will automatically close the previously opened folder. The caption of the currently opened folder is highlighted and decorated on its left side with a small triangle icon  :
:
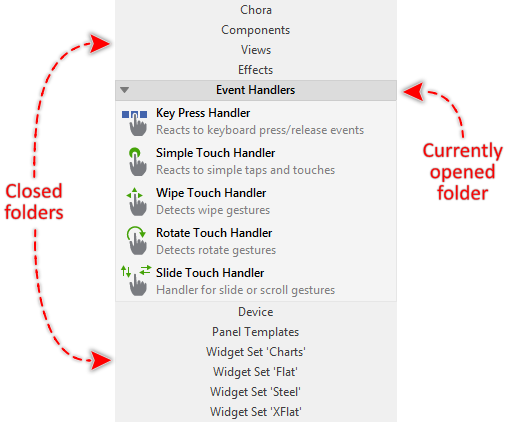
Organization of folders in Templates window
★To open a folder simply click on its caption with the mouse pointer:
TIP
As long as the Templates window is focused, you can also switch between folders by using the keyboard. For this purpose you press the key corresponding to the first latter of the desired folder name. For example, if you want to switch to the folder Views press the key V. If there are more than one folder starting with the same letter, you have to press the key multiple times in succession.
Select and use a template
You use a template by Drag & Drop it between the Templates window and the Composer window.
★First click on the desired template to select it.
★Then Drag & Drop the template into the Composer window:
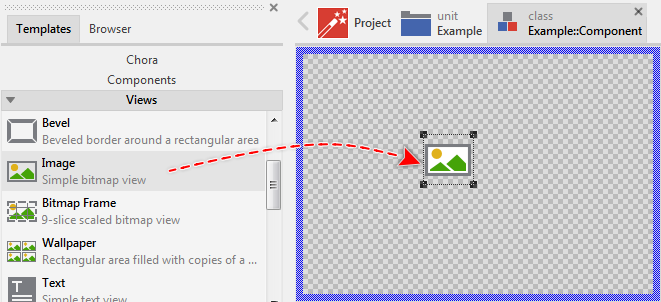
Adding an image view by Drag & Drop it from the Templates window
TIP
As long as the Templates window is focused, you can navigate within the templates list of the currently opened folder by using the keyboard. In particular, with the keys Up and Down you can scroll the list and select the desired template.
In the more advanced approach you press the key Space followed by the key corresponding to the first latter of the desired template name. For example, if you want to select the template Line press the keys Space and L in succession. If the folder contains more templates starting with the same letter, you have to press the letter key multiple times.
Instead of using the Drag & Drop, you can also copy the currently selected template into the clipboard and, in a separate step, e.g. paste it into the Composer window. To copy a template:
★First select the desired template, this can e.g. be done by using the keys Up and Down as described in the above tip.
★Select the menu item
★... or press the keys CtrlC.
Create new folder
Besides the per default installed templates, the Templates window can also manage your own created templates and folders. To create a new folder:
★Click with the right mouse button on the Templates window in order to open its context menu.
★From the context menu select the item .
Newly created folders are per default named randomly, e.g. New folderE26C. It is therefore appropriate to rename the folder immediately after creating it. See the next following section how to achieve it.
Name the folder
Unlike the folders installed with Embedded Wizard Studio, your own created folders can be renamed as desired:
★First ensure that the folder in question is opened.
★Then click with the right mouse button on the Templates window in order to open its context menu.
★From the context menu select the item .
This operation causes the Rename folder dialog to appear. There you can specify the new name for the folder.
Create new template
Besides the per default installed templates, the Templates window permits you also to create and manage any number of your own templates. From technical point of view, a template is just a copy of the original project members including their attributes and all other members embedded inside them. Accordingly, to create a new template you simply copy the desired project members between the Composer and the Templates window:
★In Composer select all members you want to store in the new template.
★Copy the selected members into the clipboard by using the menu item or by pressing the keys CtrlC.
★In Templates window ensure that the folder where you want to add the new template is opened.
★In Templates window paste the previously copied members by using the menu item or by pressing the keys CtrlV.
Alternatively you can Drag & Drop the selected members between the Composer and Templates window:
★In Composer select all members you want to store in the new template.
★Drag the selected members into the Templates window while holding the key Ctrl pressed.
★Drop the selected members over the caption of the folder you want to add the new template. Please note, if the folder is currently closed, the caption is highlighted during this operation:
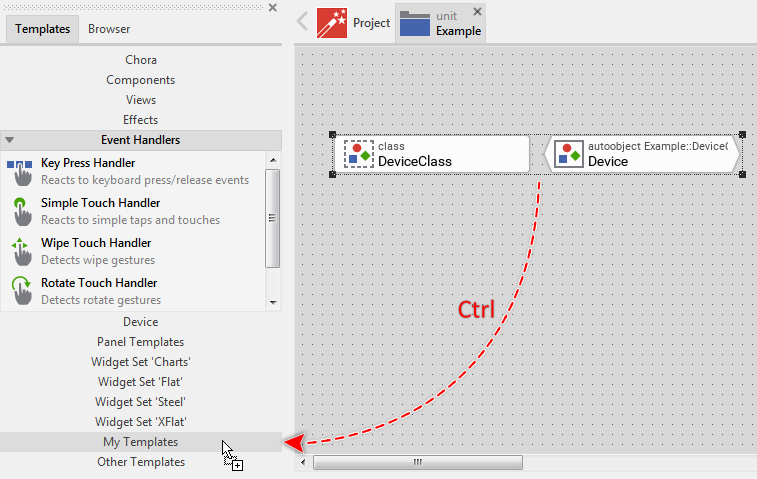
Creating in the folder My Templates a new template from the both members selected in Composer
Name the template
Unlike the templates installed with Embedded Wizard Studio, your own created templates can be renamed as desired:
★First ensure that the template in question is selected.
★Then press the key F2
★... or click with the right mouse button on the template in order to open its context menu
★and from the context menu select the item .
This operation causes the Rename template dialog to appear. There you can specify the new name for the template.
Leave description for the template
You can leave an optional description for your own created templates. The description appears then in the Templates window or in a separate tooltip window. To write the description:
★First ensure that the template in question is selected.
★Then press the key F2
★... or click with the right mouse button on the template in order to open its context menu
★and from the context menu select the item .
This operation causes the Rename template dialog to appear. Within this dialog you can edit the description.
Specify an icon for the template
If desired, you can decorate your own created templates with individual icons. The icons are ordinary PNG files in 32x32 pixel resolution. You have to store the PNG files inside a specially for this purpose existing Icons directory:
★First using your preferred graphic editor design the icon and store it as 32x32 pixel large PNG file.
★In Windows Explorer locate your home directory.
★Below your home directory locate the directory AppData\Local\Embedded Wizard\Icons
★Copy your prepared icon PNG file into this directory.
★Rename the PNG file according to the following syntax: Folder name.Template name.png
For example, if you have created a template Blinking Push Button within the folder My Widgets then the correct name of the icon file is My Widgets.Blinking Push Button.png.
★Finally you have to exit and start Embedded Wizard Studio again in order to update its internal icon cache.
Move a template between folders
Unlike the templates installed with Embedded Wizard Studio, your own created templates can be moved freely between folders. You Drag & Drop them simply:
★First within the source folder select the affected template.
★Then drag the selected template and drop it over the caption of the destination folder. Please note, the caption of the destination folder is highlighted during this operation:
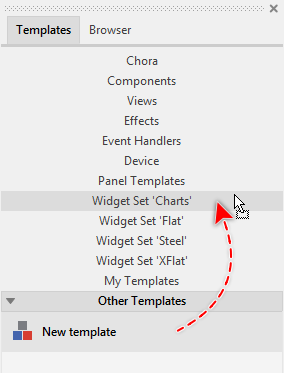
Moving a template between two folders
Delete a template
Unlike the templates installed with Embedded Wizard Studio, your own created templates can be deleted again:
★First ensure that the template in question is selected.
★Then press the key DEL
★... or select the menu item .
Embedded Wizard Studio stores automatically a backup of the deleted template. Accordingly, if desired, you can restore the template again by using the menu item .
If the delete operation is not available, your template is possibly protected.
Delete a folder
Unlike the folders installed with Embedded Wizard Studio, your own created folders can be deleted again:
★First ensure that the folder in question is opened.
★Then click with the right mouse button on the Templates window in order to open its context menu.
★From the context menu select the item .
Embedded Wizard Studio stores automatically a backup of the deleted folder and all included templates. Accordingly, if desired, you can restore the folder again by using the menu item .
Save templates
From technical point of view, templates are text files stored inside a specially for this purpose existing Templates directory. If desired you can create a backup of these files. This is in particular useful, when you plan to migrate your development system to a new workstation. To create a copy of your templates:
★In Windows Explorer locate your home directory.
★Below your home directory locate the directory AppData\Local\Embedded Wizard\Templates
★Copy this directory.
Later, you can restore the complete backup or individual template files by copying these back to the Templates directory. With this simple technique you are also able to distribute your own created templates to your customers or colleagues. The customers or colleagues have then to copy your template files into their own Templates directories. Please use the Windows Explorer for this operation.
Please note, when creating backup of your templates, you should also consider to copy the icons you have eventually created for the templates.
Protect templates
You can protect your own created templates from being accidentally deleted or renamed. For this purpose you have to set the 'read only' check box of the corresponding template file:
★In Windows Explorer locate your home directory.
★Below your home directory locate the directory AppData\Local\Embedded Wizard\Templates
★Below this Templates directory locate the directory of the folder containing the affected template. The directory is named after the original folder name with the additional extension .EWGF
★Within the directory locate the template file. The file is named after the original template name with the additional extension .EWG
★In Windows Explorer open the properties dialog for the found templates file.
★In the properties dialog set the check box or .
Hide the Templates window
If desired you can hide the Templates window. This, however, will also affect the visibility of the Gallery Browser window as both share the common screen area:
★To hide the both windows click on the small close button  at the border of the Templates window.
Once hidden the Templates window can be made visible again:
★To show the Templates window select the menu item .
★or use the keyboard shortcut Alt1.
Undock the Gallery Templates window
Per default the Templates window appears docked at the edge of the Embedded Wizard main window. Accordingly, when you move or resize the main window the Templates window is arranged automatically. If desired you can change this behavior and undock the Templates window so it appears floating and independent above the main window. In this manner you can arrange it e.g. on another monitor. To achieve this:
★Click and hold with the mouse the grip area (the dotted bar) of the Templates window.
★While holding the mouse button pressed drag the window.
★At the desired position release the mouse button again.
★Alternatively you can simply double click within the grip area.
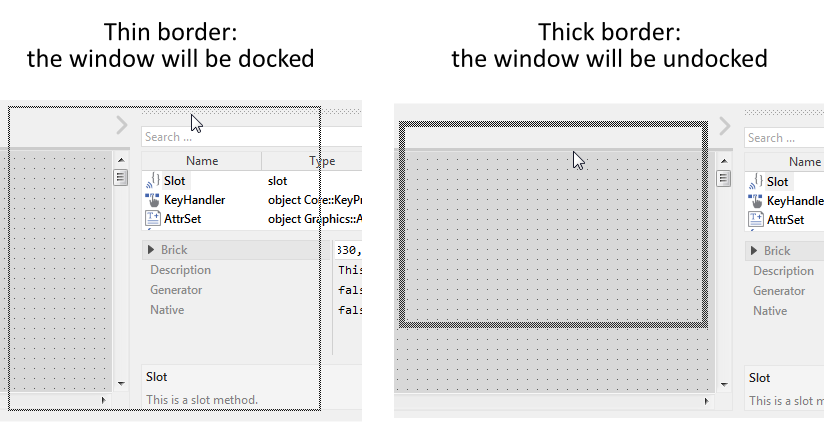
Please note the dotted border which is shown while dragging the Templates window. The border indicates the mode and position where the window will appear after you have released the mouse button. In particular, thin border indicates that the window will be docked at the given edge of the main window. The thick border, in turn, means that the window will appear undocked exact at the given position. The border changes automatically depending on how close to the edges you move the window:
★To prevent the window from being docked at an edge press and hold the key Ctrl.
★To abort the active dragging operation press the key Escape before releasing the mouse button.
Once the window is undocked and floating above the main window you can click on its caption and move it wherever it is convenient for you. If desired you can resize the window by clicking and dragging on its edges. If you want the Templates window to appear again docked within the main window do following:
★Double click on the caption bar of the Templates window. This causes the window to be docked at its latest dock position.
★Or click with the mouse on its caption and drag the window to the edge where you want to dock it.
★Press and hold the key Ctrl to force the docking mode.
★Release the mouse button and then the Ctrl key.