Menu and Toolbar: Extras
The menu and the corresponding toolbar contain various commands to customize the workflow:
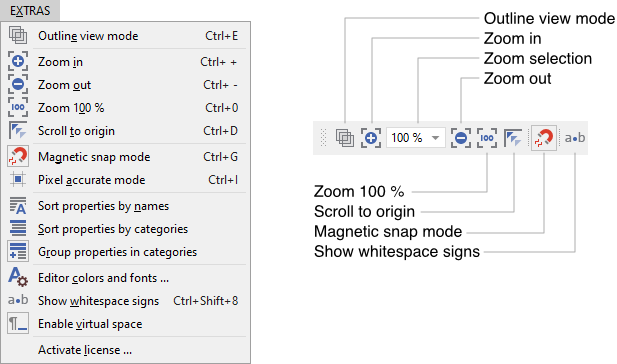
The menu and the corresponding toolbar
Outline view mode
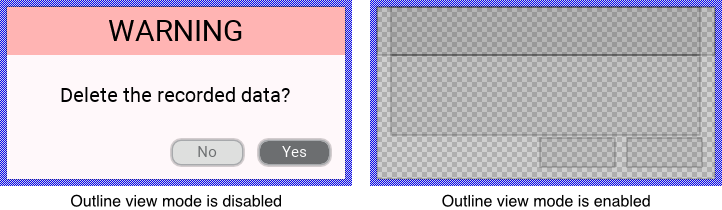
This menu item controls how to display views in the Canvas area of the Composer window. Per default, all views are displayed as they are: an Image view shows the associated bitmap, the Text view displays the text, etc. When the menu item is enabled, only the outline of the views is displayed. This is useful to get an impression of the composition of the GUI component. The following figure demonstrates the resulting effect without and with the menu item enabled:
Zoom in
This command increases the zoom factor of the currently active Composer page to the next higher value. The actual zoom factor is displayed in the Zoom selection combo box.
Zoom out
This command decreases the zoom factor of the currently active Composer page to the next lower value. The actually zoom factor is displayed in the Zoom selection combo box.
Zoom 100 %
This command resets the zoom factor of the currently active Composer page to 100 %. The actually zoom factor is displayed in the Zoom selection combo box.
Scroll to origin
This command scrolls the Composer to its origin position.
Magnetic snap mode
With this command you enable or disable the magnetic alignment feature for views. If the is enabled and you move or resize a view in the Composer window, the view is automatically aligned at edges, corners and centers of adjacent views as well as at edges and the center of the Canvas area itself. Similar occurs when you resize the Canvas area. This is useful to arrange the views when you compose a GUI component. Please note, the magnetic alignment feature affects views only and has no effect on bricks nor annotation members. These are always aligned at fixed grid. See also Alignment and grid.
TIP
To temporarily suppress the magnetic snap mode press the key Shift while dragging or resizing a view. If the mode is already deactivated with the menu item , pressing the key Shift permits you to activate this feature temporarily again.
Pixel accurate mode
If your Windows workstation is connected to a HiDPI monitor and you have configured Windows to scale the screen contents, Embedded Wizard IDE is automatically scaled to appear correctly as other Windows application do. That also applies to the Composer and Prototyper windows. For example, when you have configured Windows to scale the contents with 175 %, the Composer and Prototyper will show the GUI components scaled accordingly with 175 %.
If this behavior is not desired, you can activate the menu item . The Composer and the Prototyper will thereupon display all contents by ignoring the scaling resulting from Windows settings. If the specified Zoom factor is 100 %, 1 GUI pixel will correspond then to exact 1 pixel on your monitor.
Sort properties by names
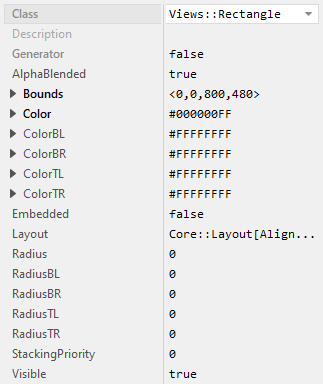
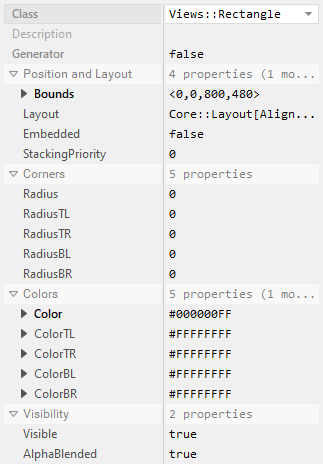
The menu items from this section control how properties in the middle area of the Inspector window are sorted and grouped. By selecting the Inspector will display the properties sorted by their names. This corresponds to the default behavior of Embedded Wizard 12 and older:
Sort properties by categories
The menu items from this section control how properties in the middle area of the Inspector window are sorted and grouped. By selecting the Inspector will display the properties sorted by their categories. Additional category names are displayed providing more overview. All categories are expanded revealing all existing properties:
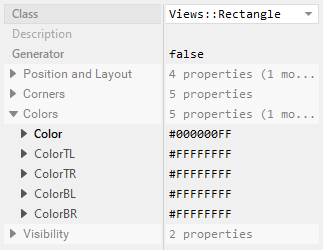
Group properties in categories
The menu items from this section control how properties in the middle area of the Inspector window are sorted and grouped. By selecting the Inspector will group the properties in categories the properties belong to. The categories can be expanded and collapsed:
Editor colors and fonts ...
The menu command opens the Editor colors and fonts dialog where the appearance and syntax highlighting of the Code Editor can be customized.
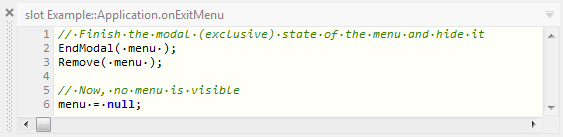
Show whitespace signs
With this command you can control the appearance of whitespace characters (e.g. blanks or tabulators) in the Code Editor window. Per default, whitespace characters are not displayed. However, if this command is enabled, the whitespace characters appear as small dots as demonstrated in the following screenshot:
Enable virtual space
With this command you control the caret behavior in the Code Editor window. If virtual space is enabled, you can move the caret to any position within the Code Editor, even beyond the end of a text row. If the menu item is disabled, the caret can be moved within the existing text only and the caret cannot be positioned after the end of the line unless spaces are added to accordingly move the carriage return.
Activate license ...
Except the Free edition, Embedded Wizard Studio is protected by a license key and license management system running on our servers. With the menu command you can enter your license key. The license key is provided by your distributor or TARA Systems GmbH after you have purchased a new or upgraded an existing license. When you activate this menu item, Embedded Wizard displays the Activate License dialog where you can enter the license key.
IMPORTANT
Versions of Embedded Wizard older than 10.00 were protected by a hardware USB dongle. Starting with the version 10.00 the license keys replace the dongles. If you update from an older version, please contact us to receive an adequate license key as replacement for the dongle.
Please note, the Free Edition of Embedded Wizard Studio doesn't use any license keys. Accordingly, the menu item is not available in this version.
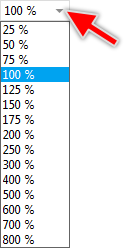
Zoom selection
The Extras toolbar provides a combo box where the zoom factor of the currently active Composer page can be selected.
★To see a list with available zoom factor values click on the small triangle  on the right side of the Zoom selection combo box.
★From the list select the desired zoom factor.