Embedded Wizard Studio: Log window
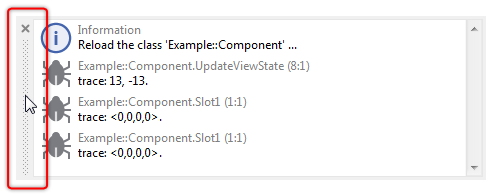
The Log window displays status reports, warnings and errors occurred during working with Embedded Wizard. Similarly all project search results and the prototyping and debugging outputs are collected in this window. The window is arranged per default in the bottom-left area of Embedded Wizard Studio:

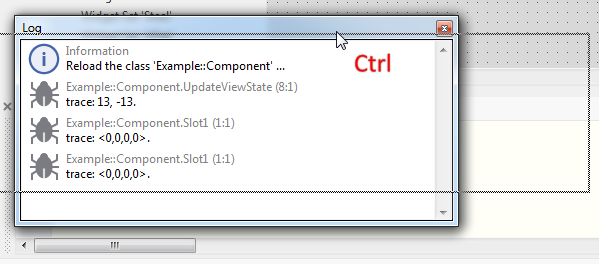
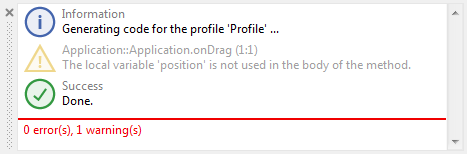
Log window
The messages are displayed strictly in the order in which they have been collected. Every message is decorated with an individual icon reflecting the message type. If the message is related to a particular location within the project, this location appears in the message upper text row. In the case the message is not related to any project location, the upper row limits to show the generic type of the message only.
Following table provides an overview of all message types:
Icon |
Type |
Description |
|---|---|---|
|
Information |
Messages of this type provide common information. Such messages appear to inform you, that a particular operation took place or just begun. |
|
Success |
Messages of this type inform you, that a particular operation was finalized successfully. |
|
Warning |
Messages of this type appear when a potential problem has been detected. You should inspect the message and eventually fix the problem. For example, when a local variable is declared but not used, a warning is reported. |
|
Error |
Messages of this type appear when a problem has been detected. You should inspect and fix the problem. For example, when a non existing variable is used within an expression, an error is reported. |
|
Debug |
Messages of this type appear during prototyping and debugging of the GUI application. For example, every execution of the trace statement produces a debug message. |
|
Search |
Messages of this type appear during project search operation. For every occurrence matching the search condition a corresponding message appears in the Log window. |


Show the Log window
Usually the Log window is visible all the time. However, if you have hidden the window unintentionally, you can show it again:
★To show the Log window select the menu item .
★or use the keyboard shortcut Alt5.
Using the described menu item or the shortcut while the Log window is already visible causes the window to become focused only. Subsequently you can interact with the Log window by using the keyboard without the necessity to previously click on it with the mouse.
Inspect a message
Messages related to particular project members can be inspected causing the affected locations being shown in the Composer, Code Editor or Inspector window. This is usually the case of warning, error, search or debug messages.
★The simplest way to inspect a message is to double click on it.
Alternatively you can:
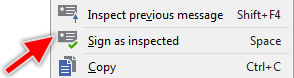
★Click on the message with right mouse button to open the context menu.
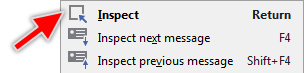
★In the context menu select the item .
As long as the Log window is focused you can inspect the messages also by using following keyboard shortcuts:
★Use the keys Up and Down to scroll the message list and select the desired message.
★Press the key Return to inspect the selected message.
Inspect the next/previous message
Besides the above described approach to inspect a single Log window message Embedded Wizard provides functionality to simply traverse through the collected messages. This is in particular very useful when there is a lot of messages collected and you need to inspect all of them step by step.
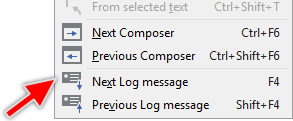
★To inspect the next message following the currently selected (the last inspected) message press the key F4.
★or select in the main menu the item .
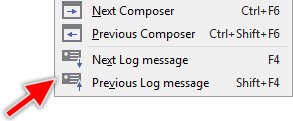
★To inspect the message preceding the currently selected message press the key ShiftF4.
★or select in the main menu the item .
Please note, that the function to traverse through the messages takes only those messages in account which in fact are related to a location within the project.
Status of a message
Messages which have been inspected appear in the Log window slightly grayed out. In this manner it is simply to recognize which messages have not yet been inspected and which are already evaluated.
If necessary the inspect status of a single message can be toggled individually.
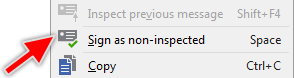
★Click on the message with right mouse button to open the context menu.
★In the context menu select the item or depending on the current message status.
As long as the Log window is focused you can toggle the message status also by using following keyboard shortcuts:
★Use the keys Up and Down to scroll the message list and select the desired message.
★Press the key Space to toggle the status of the selected message between inspected and non-inspected.
Clear the log
To remove all currently collected messages do following:
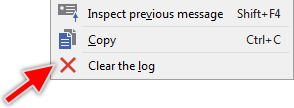
★Click within the Log window with right mouse button to open the context menu.
★In the context menu select the item .
Copy all messages
All currently collected messages can easily be copied as text into the clipboard. Subsequently, the copied messages can be pasted within an email or documentation.
★Click within the Log window with right mouse button to open the context menu.
★In the context menu select the item .
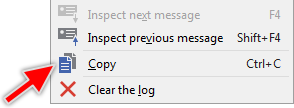
As long as the Log window is focused you can copy the messages also by using following keyboard shortcut:
★Press the key CtrlC to copy all collected messages to the clipboard.
Hide the window
Usually the Log window is visible all the time. If necessary the window can be hidden easily:
★To hide the Log window click on the small close button  at the border of the Log window.
Once hidden the Log window can be made visible again:
★To show the Log window select the menu item .
★or use the keyboard shortcut Alt5.
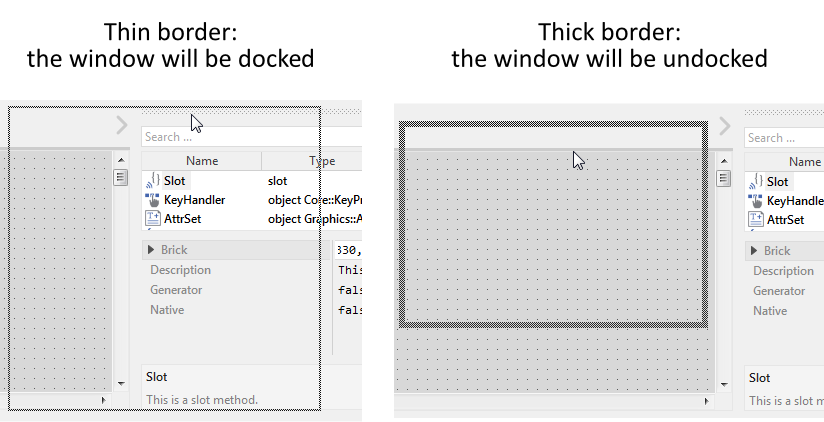
Undock the Log window
Per default the Log window appears docked at the edge of the Embedded Wizard main window. Accordingly, when you move or resize the main window the Log window is arranged automatically. If desired you can change this behavior and undock the Log window so it appears floating and independent above the main window. In this manner you can arrange it e.g. on another monitor. To achieve this:
★Click and hold with the mouse the grip area (the dotted bar) of the Log window.
★While holding the mouse button pressed drag the window.
★At the desired position release the mouse button again.
★Alternatively you can simply double click within the grip area.
Please note the dotted border which is shown while dragging the Log window. The border indicates the mode and position where the window will appear after you have released the mouse button. In particular, thin border indicates that the window will be docked at the given edge of the main window. The thick border, in turn, means that the window will appear undocked exact at the given position. The border changes automatically depending on how close to the edges you move the window:
★To prevent the window from being docked at an edge press and hold the key Ctrl.
★To abort the active dragging operation press the key Escape before releasing the mouse button.
Once the window is undocked and floating above the main window you can click on its caption and move it wherever it is convenient for you. If desired you can resize the window by clicking and dragging on its edges. If you want the Log window to appear again docked within the main window do following:
★Double click on the caption bar of the Log window. This causes the window to be docked at its latest dock position.
★Or click with the mouse on its caption and drag the window to the edge where you want to dock it.
★Press and hold the key Ctrl to force the docking mode.
★Release the mouse button and then the Ctrl key.