Build Environments: Getting started with JavaScript/WebGL
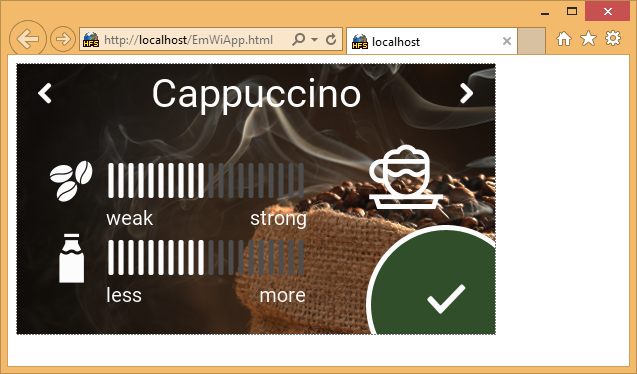
Embedded Wizard generated UI application running in a browser.
The following article explains all necessary steps to create an Embedded Wizard UI application that can be executed within an HTML browser as JavaScript application using WebGL.
Please follow these instructions carefully and step by step in order to ensure that you will get everything up and running within your browser. In case you are not familiar with Embedded Wizard, please read first the chapter basic concepts and the Quick Tour tutorial to understand the principles of Embedded Wizard and the GUI development workflow. Moreover, this article assumes that you are familiar with JavaScript and HTML.
First, make sure you have all of the following items:
Hardware components
★Hardware system with a WebGL capable HTML5 web browser
Software components
★Embedded Wizard Studio Free or Embedded Wizard Studio Pro
If you want to use the Free edition of Embedded Wizard Studio please register on our website and download the software.
As a customer, please visit the Embedded Wizard Download Center (login/password required) and download Embedded Wizard Studio Pro.
★Optional: A local web server, e.g. HFS - HTTP File Server
Installing Tools and Software
★Step 1: Install the latest version of Embedded Wizard Studio.
★Step 2: Optional: Install a local web server if you are using Chrome browser. This browser does not allow access to local files (for security reasons), so the usage of a local web server can be helpful.
Creating the UI Application
In order to make the first UI application up and running within a browser, we recommend the following steps:
★Open one of the examples that are provided with your Embedded Wizard Studio installation (e.g. CoffeeMachine).
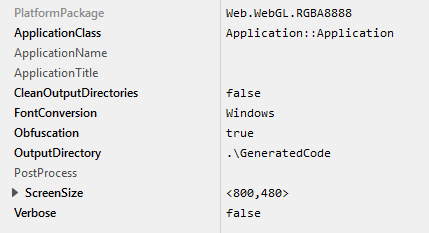
★Add a new profile to the project and rename it to WebGL.
★Set the profile attribute PlatformPackage to the value Web.WebGL.RGBA8888 and change the attribute ScreenSize to a size which corresponds to the size of the application (e.g. <480,272> for the CoffeeMachine). The attribute ApplicationClass refers to the class of the application (e.g. Application::Application).
★Choose a directory for the generated code by using the profile attribute OutputDirectory (e.g. {UserDocumentFolder}\WebGL).
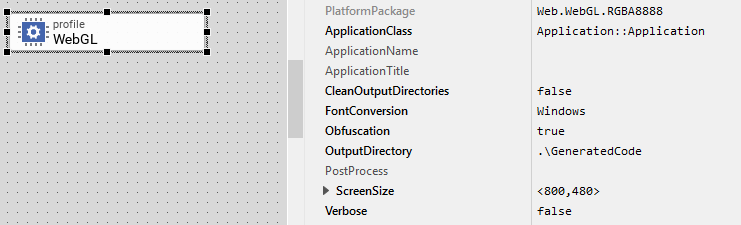
★Select the new profile WebGL within the profile selection box.
★To start the code generator, select the menu items - or simply press F8. Embedded Wizard Studio generates now the code of the example project into the output directory (e.g. {UserDocumentFolder}\WebGL). There you will find the generated JavaScript files and an HTML page that can be launched within a browser.
Launching the UI Application
If your browser allows the access to local files, you can directly open the generated HTML page with the browser. Otherwise, if access to local files is not allowed for security reasons, please copy all files to a web server. Alternatively, you can use a local web server, e.g. HFS - HTTP File Server.
IMPORTANT
If you want to deploy the generated code, please ensure that the attribute Obfuscation in the profile is set true and the file _debug_only_dont_deploy.txt is removed from the output directory containing the generated code.
Creating your own UI Applications
In order to create your own UI project suitable for the browser, you can create a new project and select the WebGL project template:
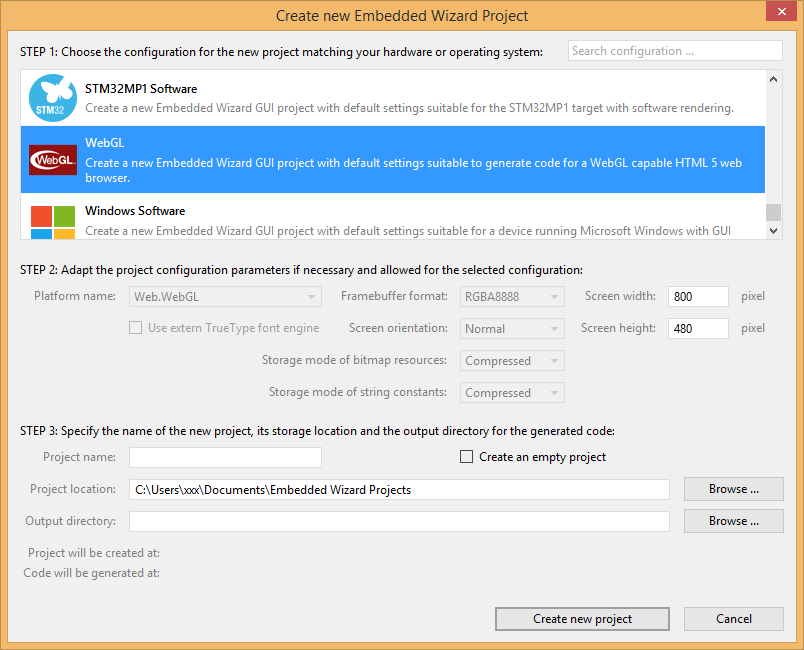
As a result you get a new Embedded Wizard project, that contains the necessary Profile attributes suitable for a web browser: