Project members: Annotation arrow
With arrow annotations you can point to a particular project member or a member group. The arrow annotation is used often together with the legend and group annotations. As such the annotations are very useful for foreigner developers to understand the structure of your implementation. Group annotation members appear in Composer as gray pointers (arrows):
The annotations have no effect on the application itself. They exist for descriptive purpose only. Annotations can be used everywhere within your project.
Annotations and inheritance
Unlike other members, annotations are not inherited when you derive a new class from a base class containing annotations. The annotations from the base class are simply ignored.
Add new arrow annotation
★First switch to the Composer page you want to add the annotation member.
★Then, in the Gallery window, ensure that the folder Chora is opened.
★Look in the folder for the template named Annotation Arrow.
★With the mouse, select the template and drag it into the Composer.
★Drop the template within the Composer.
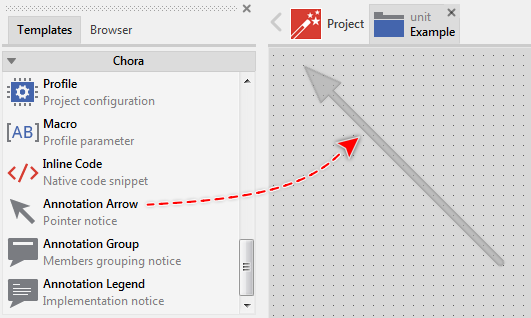
Adding a new annotation member.
Arrange the annotation
★First ensure, that the annotation member is selected.
★To move the entire annotation member click it with the mouse and move it.
★To move its start/end position, click with the mouse on it and move it.
★Alternatively, you can control the position of the annotation box by modifying its attributes Point1 and Point2.
Name the annotation
★First ensure, that the annotation member is selected.
★Press the key F2 or select the menu item .
★Enter the new name in the Inspector window.
The name of the annotation member has no effect on the function of your application. However, it has to be unique in its particular context.
Duplicate an existing annotation
You can create any number of copies of an already existing annotation member.
★First ensure, that the annotation member is selected.
★Press the keys CtrlC and CtrlV in succession ...
★... or hold the key Ctrl pressed while you drag and drop the selected annotation member.
★Finally rename the just duplicated annotation member.
Delete an annotation
★First ensure, that the annotation member is selected.
★Press the key DEL or select the menu item .
Attributes of an annotation arrow
The following table shows the complete list of attributes provided by the arrow annotation member:
Attribute name |
Short description |
|---|---|
Determines the start position of an annotation arrow member. |
|
Determines the end position of an annotation arrow member. |